We recently got a new kitty, and I feel bad for her. We have to save her all the time. Between Lily and Emily that poor cat never gets to walk on her own. The girls named her Snowflake. She is quite the mellow, lovable, kitty. I just hope she stays that way LOL I know the girls love her, but damn, give a kitty some space.
I play the role of super mommy, kick-ass girlfriend, and hard working employee every day. Now I have to add baby baker to the list for the next few months as well. Most days I lose my mind in the middle of the day, but I wouldn't have it any other way.
Thursday, May 24, 2012
Thursday, May 10, 2012
My first DIY furniture project
I upcylced? refinished? beautified? my old desk. I have no idea what the crafty term is.
You know those ugly brown metal industrial desks of like the 70's? Yeah I had one looked like this only longer. It came complete with chipping paint and all
I hated it, and I was a little embarrassed when people saw it or I accidentally caught it in pictures of my kids.
It wasn't ME
I decided to do something about it now that we moved into our new house (yes we bought a house and I didn't even blog about it *gasp*)
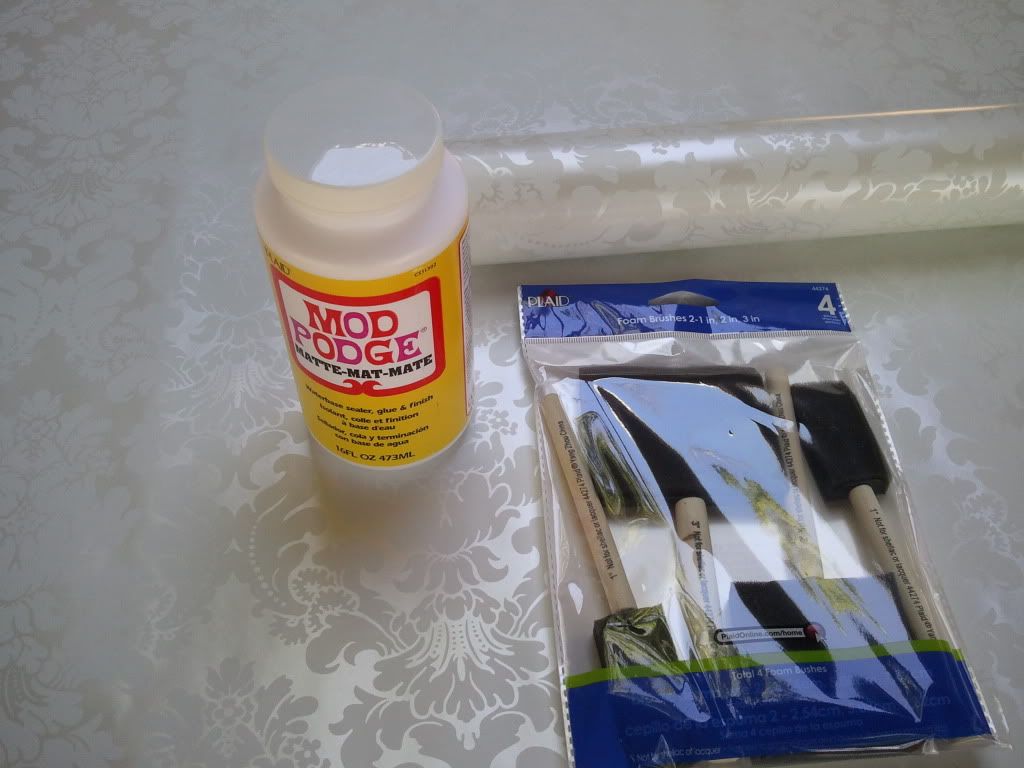
I went out and got some pink spray paint, some cute wrapping paper to match, some sponge brushes, and some Mod Podge. I got home and got to it!
You can't see the spray paint here because I didn't even think to document this over haul until I had already started painting. It was Ballet Slipper Pink from Krylon
Sorry :D
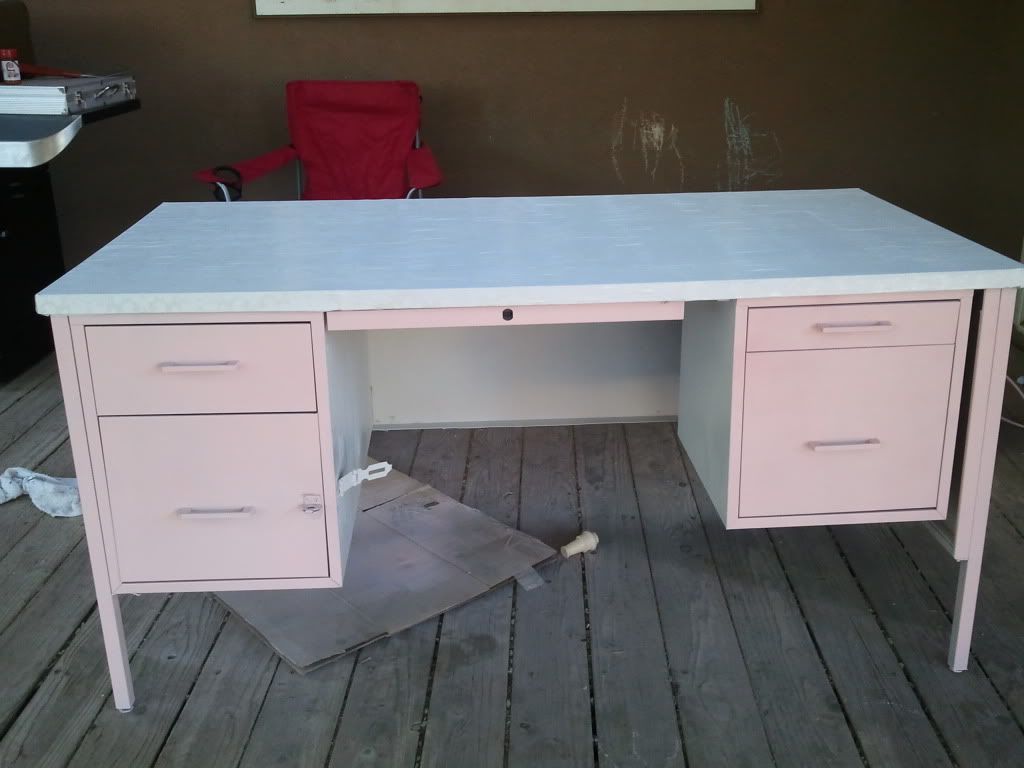
First I set out painting that bad boy. I wish someone had told me to sand it down a bit before starting, or at least primer it. If you can't tell I'm pretty new at this stuff. Well here we are phase one in painting. I ended up doing about 3 or 4 coats to cover it all, and I ran out of pink paint. I ended up using some white that I had laying around for the inside part
Please pardon the bubbles and sidewalk chalk. Oh, and forgive my use of a cardboard box to keep the paint off of our deck.
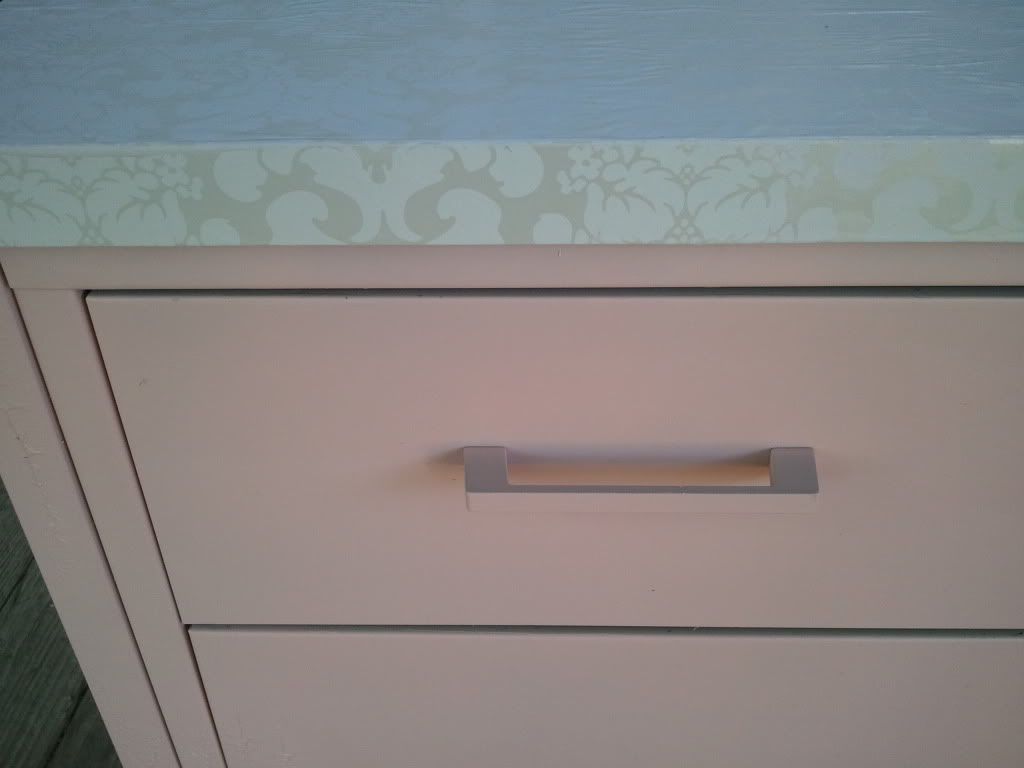
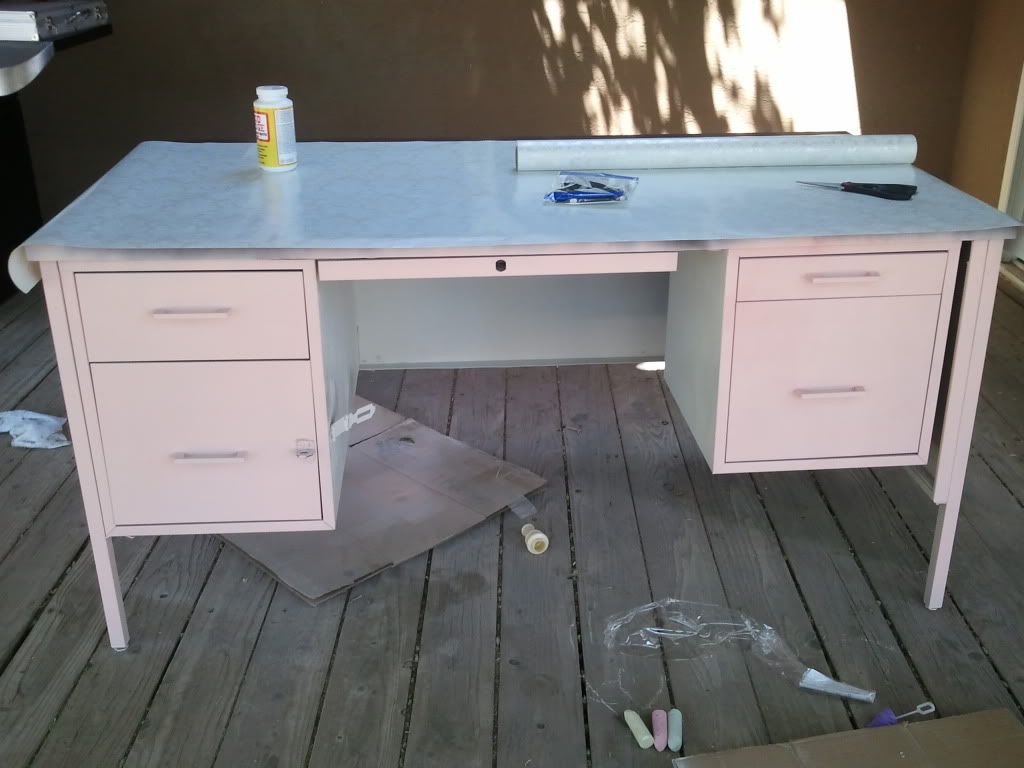 After all of that darn painting I grabbed my scissors and measured and cut the paper. I left a bit on each side so that I could wrap the paper under the edges of the top.
Geez I'm messy. The crap sort of started to accumulate outside as I went along LOL
Any who...... on we go
I just slathered some Mod Podge on the top in 3 inch sections, and unrolled the paper I measured out as I went along. I tried my best to smooth out any air bubbles, but I knew it would still end up wrinkly. I had read that would happen on a Pinterest pin somewhere, but I don't recall what the project was. After all of that I just tossed some Mod Podge on the top, let it dry, and then did it again.
You know those ugly brown metal industrial desks of like the 70's? Yeah I had one looked like this only longer. It came complete with chipping paint and all
I hated it, and I was a little embarrassed when people saw it or I accidentally caught it in pictures of my kids.
It wasn't ME
I decided to do something about it now that we moved into our new house (yes we bought a house and I didn't even blog about it *gasp*)
I went out and got some pink spray paint, some cute wrapping paper to match, some sponge brushes, and some Mod Podge. I got home and got to it!
You can't see the spray paint here because I didn't even think to document this over haul until I had already started painting. It was Ballet Slipper Pink from Krylon
Sorry :D

First I set out painting that bad boy. I wish someone had told me to sand it down a bit before starting, or at least primer it. If you can't tell I'm pretty new at this stuff. Well here we are phase one in painting. I ended up doing about 3 or 4 coats to cover it all, and I ran out of pink paint. I ended up using some white that I had laying around for the inside part
Please pardon the bubbles and sidewalk chalk. Oh, and forgive my use of a cardboard box to keep the paint off of our deck.
 After all of that darn painting I grabbed my scissors and measured and cut the paper. I left a bit on each side so that I could wrap the paper under the edges of the top.
Geez I'm messy. The crap sort of started to accumulate outside as I went along LOL
Any who...... on we go
I just slathered some Mod Podge on the top in 3 inch sections, and unrolled the paper I measured out as I went along. I tried my best to smooth out any air bubbles, but I knew it would still end up wrinkly. I had read that would happen on a Pinterest pin somewhere, but I don't recall what the project was. After all of that I just tossed some Mod Podge on the top, let it dry, and then did it again.
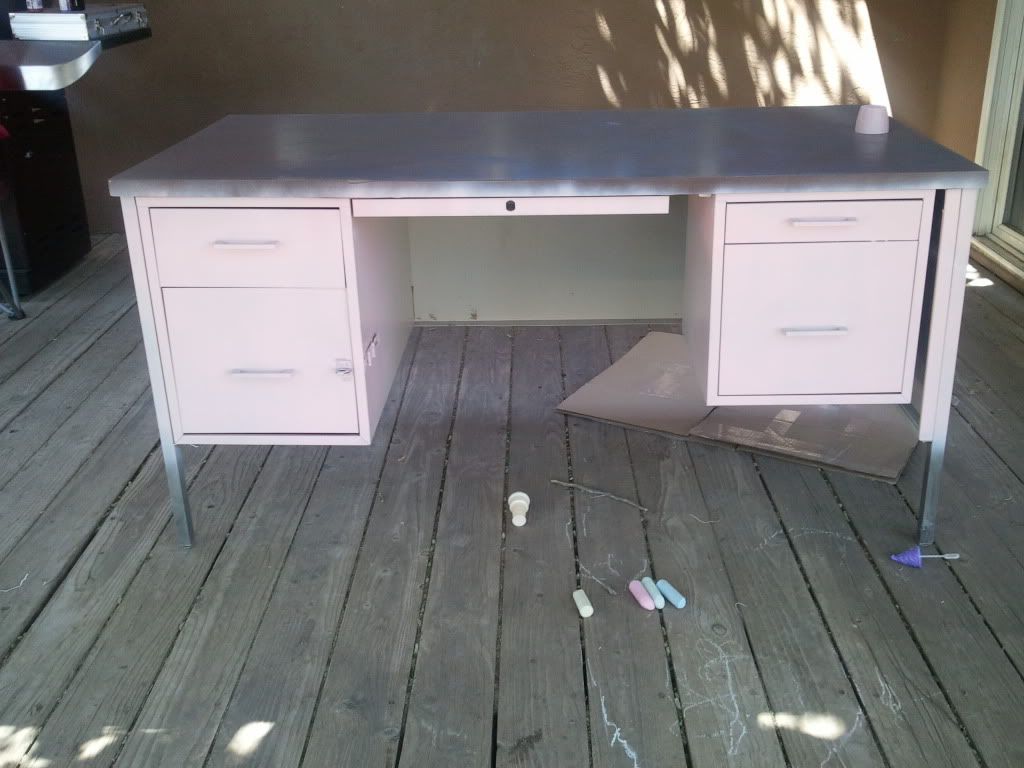
Here is the final product
Over all not bad for my first project. I mean it was a $25 desk, so had I screwed it up, it wouldn't have been the end of the world.
Subscribe to:
Comments (Atom)


